By this mean, we will be sure to obtain a total covering by moving the scope along only one axis.

And a picture with holes is a bloody awful picture !
The purpose of this page is only to show how I realize a lunar mosaïc.Many
other technics are available, and if you think that you know a useful trick,
do not hesitate to let me know it.
On the one hand, I'm always looking for new tricks, and on the other hand I
will make known them to the community through this page,
This first step is obviously the essential part of the job. If the shot is spoiled, at best you will get a bad quality picture, at worst you will have unexploitable pieces of image that you will be unable to gather together.
Some obvious points that are always worth to remind :
| Now, we must take a great care in setting the orientation of the webcam.
The sides of the image must be parallels to the movements of the telescope.
By this mean, we will be sure to obtain a total covering by moving the scope along only one axis. |
|
| If we don't take this precaution, we will obtain a "stairs step"
covering, and unless to be lucky, we will get holes in the final picture. And a picture with holes is a bloody awful picture ! |
|
Next, we need to set the exposure time and amplification of the webcam. We
must not let them on automatic, but set them so that no area of the Moon will
be over-exposed. In the same way, it will be interesting to let the white balance
on a fixed value. All this is necessary to minimize the light differences between
the individual pictures.
For a full Lunar picture, I tune the webcam on the most brilliant areas of the
Moon.

For the shot itself, I use QcFocus. I take 20 seconds films, at the rate of
15 pictures/second. Each film is about 130 Mo, for 300 pictures.
You must not hesitate to take a large overlapping between two successive pictures.
This will be of a great help for aligning the pictures later, and of course,
you minimize the risk of discovering a hole in the final picture.
To process the films, I use Registax. This freeware is a good software, even if its ergonomy is surely not the best one (this explanation uses Registax v2.1, I haven't yet tried the v3).

For the choice of the alignment box - the square in the upper right corner, I only aim at a noticeable detail, the processing is sensitive enough to correctly do the job.

Ideally, the alignment filter (or FFT filter) must be located at the end of the curve, and the quality filter must be centered on the elbow of the curve, with a quality factor between 0,11 et 0,16.
The optimization features used here give usually good results for the Moon and
the planets too.
Be careful with the tracking : don't tick the boxes 'Predict track' and 'Misalign
Warning'. Not only this is of no interest, but sometimes Registax can crash.
And now, we only have to click on the button 'Align'.
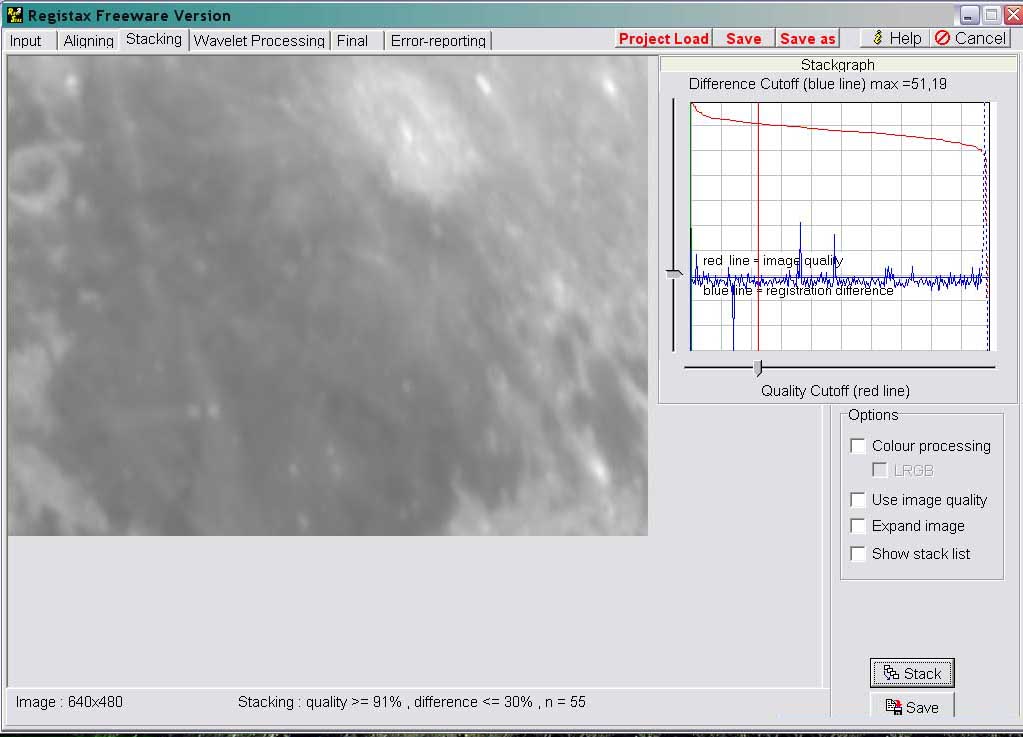
The vertical cursor defines a quality level (fullness of the spectrum) of the
pictures, and the horizontal cursor limits the differences between the pictures.
The point of the curve which is on the bottom axis stands for the initial picture,
that we choosed at the first stage, and which is used as a reference.
The positioning of the two cursors is simple enough when the curve is similar
to the one which is shown here. We just have to lop the curve in order to discard
the pictures with too much difference, and we adjust the quality to keep the
right number of pictures. If the curve is less perfect (a quickly falling quality
for example) it may be necessary to try some different adjustments to find the
one with the best results.
Of course, the higher is the quality of the individual pictures, the better
will be the final picture.
Possibly, we can check the 'Use Image Quality' box, but the differences are
often small.
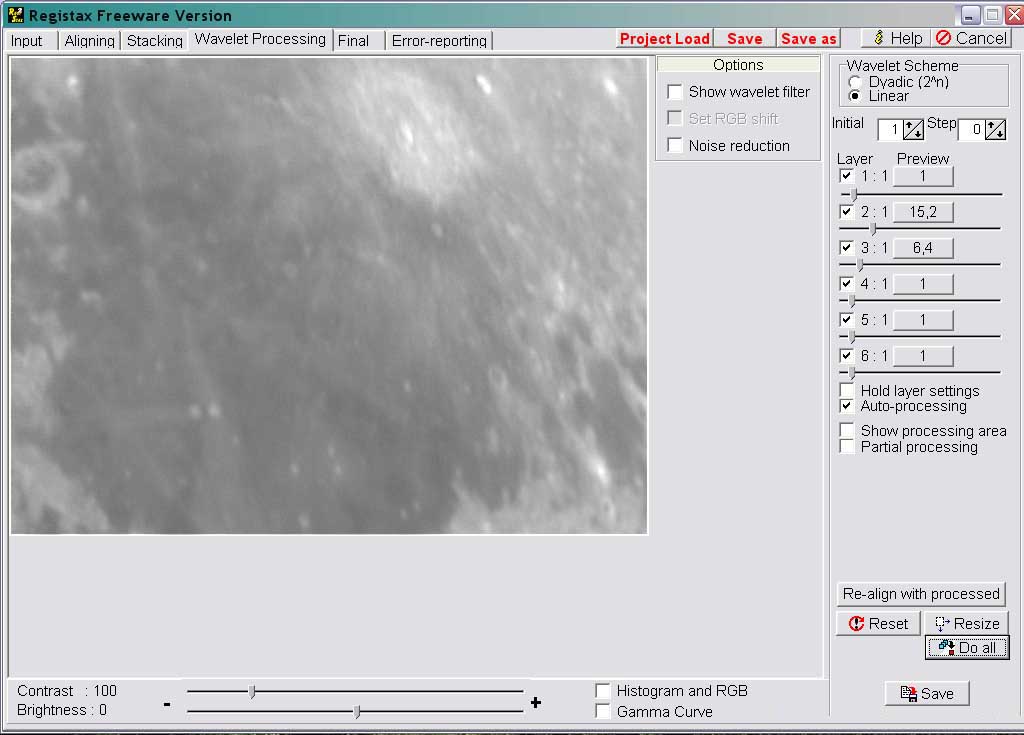
You can always try with other values, especially if the quality of the pictures is good enough, a small value on the fourth layer can be interesting for some areas. On the other hand, it may be necessary to slightly lower the values near the terminator to avoid artefacts.
When all the pictures have been prepared, we must paste them together. To do
so, a software like Photoshop (or PaintShop Pro) is really useful. We just have
to paste each picture as a new layer and to settle it in relation to the next
ones.
 |
 |
| By using the mode 'différence', it is easy to settle a picture in relation to the already fixed ones. On the left picture, there still remains a slight gap, but on the right one, the new picture has been perfectly fit in. | |
Using a blurred edges eraser will cleanly suppress the edges of the picture, and will make the joins disappear.
|
Here is the image, once all the individual pictures have been pasted. |
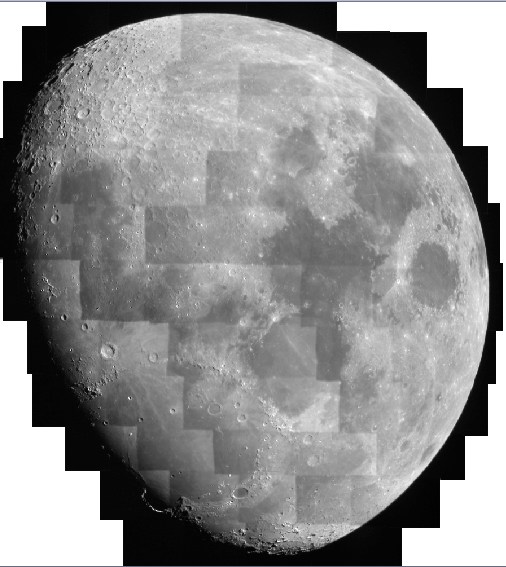
|
The final result is visible here. The picture has been turned over to appear in the "right" direction, at least the one that we are used to see the Moon !